Explore the advantages of ultrasound therapy for diagnosing and treating musculoskeletal injuries effectively.
Table of Contents
Introduction: A Deeper Look into the Body’s Interior Landscape
Welcome to this in-depth exploration of musculoskeletal (MSK) ultrasound, a revolutionary diagnostic and therapeutic tool that has fundamentally changed how we, as clinicians, visualize and interact with the body’s intricate anatomy. In my years of practice as both a Doctor of Chiropractic (DC) and a Family Nurse Practitioner (FNP-APRN), I have witnessed firsthand the evolution of diagnostic imaging. From the static, two-dimensional snapshots of X-rays to the powerful but often costly and time-consuming insights of MRI, each modality has its place. However, MSK ultrasound has carved out a unique and indispensable role, offering a dynamic, real-time window into the body that is both safe and cost-effective. It is, in essence, our “digital stethoscope” for the muscles, tendons, ligaments, and nerves, allowing us to see pathology in motion, guide interventions with pinpoint accuracy, and provide patients with immediate visual feedback about their condition.
In this educational post, I will guide you through the fundamental principles of ultrasound imaging from my clinical perspective, informed by the latest evidence-based research from leading experts in the field. We will begin by demystifying the language of ultrasound, learning to interpret the shades of gray that paint a picture of our internal structures. We’ll define key terms like hyperechoic, hypoechoic, and anisotropic, and understand how to recognize the characteristic “pattern” of different tissue types—the fibrillar striations of a healthy tendon, the “starry night” appearance of muscle, the honeycomb structure of a nerve, and the smooth, dark band of hyaline cartilage.
Building on this foundational knowledge, we will delve into the practical application of ultrasound in a clinical setting. I will share my personal techniques for probe handling, emphasizing the importance of stability, control, and what I call the “tripod technique.” We will discuss the critical difference between holding the probe for a purely diagnostic scan versus an interventional procedure. This nuance can make or break the success of a guided injection. A significant portion of our discussion will be dedicated to anisotropy, a potential pitfall that can mimic pathology and lead to misdiagnosis. I will explain its physiological basis and demonstrate, through clinical examples, how to differentiate this imaging artifact from a true tendon or ligament tear using specific probe maneuvers and dynamic assessments.
Furthermore, we will explore the unparalleled advantage of ultrasound: its ability to perform real-time, dynamic evaluations. I will discuss how we can apply stress to a joint while imaging to assess ligamentous integrity, observing for gapping that indicates a tear—a diagnostic capability no static image can offer. We’ll also cover the process of tracing structures to their origins and insertions to definitively identify them, a simple yet powerful method to distinguish a tendon from a ligament, for example. Finally, I will share clinical pearls gleaned from my own practice at HealthVoice360, such as the “fast scanning” technique for identifying elusive nerves and the importance of patient and probe Orientation for seamless orientation procedures. This comprehensive guide aims to equip you not just with theoretical knowledge but with the practical, evidence-based insights needed to confidently and effectively integrate MSK ultrasound into your own practice, ultimately enhancing diagnostic accuracy and improving patient outcomes.
Understanding the Language of Ultrasound: A Pattern Recognition Approach
As a clinician who relies heavily on musculoskeletal ultrasound, I often describe it to my patients and colleagues as a form of pattern recognition. It’s not just about seeing black, white, and gray on a screen; it’s about learning to interpret these shades as a language that describes the body’s internal landscape. Each tissue type has a unique ultrasonic signature, a characteristic pattern that, once learned, becomes as recognizable as a familiar face. Our goal is to become fluent in this language.
The core principle of ultrasound imaging involves sending high-frequency sound waves into the body via a transducer, or probe. These sound waves travel through tissues, and depending on the tissue’s density and acoustic properties, they are either reflected to the probe or transmitted deeper. The machine then interprets the timing and strength of these returning echoes to construct a real-time image.
Tissues that strongly reflect sound waves appear bright white on the screen. We call this hyperechoic. Bone is the classic example; it’s so dense that it reflects nearly all sound waves, creating a brilliant white line and casting a dark “acoustic shadow” behind it because no sound can penetrate further. Conversely, tissues that allow most sound waves to pass through with little reflection appear dark or black. We refer to this as hypo-echoic or, if completely black, anechoic. Fluid-filled structures like cysts or bursae are typically anechoic.
Most of our soft tissues, however, fall somewhere in between, creating a spectrum of gray. When a tissue has a similar brightness or echogenicity to the adjacent tissue, we call it isoechoic. Understanding this basic vocabulary is the first step. The next, and more crucial step, is recognizing the architectural patterns within these shades of gray.
The Signature Appearance of Tendons
Let’s start with a structure we evaluate constantly: the tendon. In a healthy state, when imaged along its long axis (in line with its fibers), a tendon presents a beautifully organized, hyperechoic, and fibrillar pattern. I often describe this to students as looking like a bundle of tightly packed, uncooked spaghetti or a collection of bright, parallel stripes.
A perfect example is the patellar tendon, as seen in the image above. You can clearly see the hyperechoic, fibrillar structure. This organized pattern directly reflects the tendon’s physiological function. It is composed of densely packed Type I collagen fibers, all aligned in the direction of tensile force, designed to transmit the immense power generated by the quadriceps muscle to the tibia, enabling knee extension. The ultrasound beam reflects strongly off these dense, parallel fibers, creating that characteristic bright, striated appearance.
In this same view, we can identify adjacent structures based on their own unique patterns. Below the patellar tendon, you can see a wavier, less organized, and more isoechoic structure—this is the infrapatellar fat pad, also known as Hoffa’s fat pad. To the right of the screen is the bright, sharp, hyperechoic line of the tibia, and to the left, the corresponding bright line of the patella. Being able to identify these bony landmarks is crucial for orientation. By visualizing the orientation of the connection from the bone (patella) to the bone (tibia), we confirm that we are indeed looking at a ligamentous structure (in this case, the patellar ligament, though often called a tendon). This ability to trace a structure from origin to insertion is a fundamental skill in musculoskeletal ultrasound.
Visualizing Muscle and Cartilage
The Intricate Pattern of Healthy Muscle
Muscle tissue presents a different, yet equally distinct, pattern. Compared to the bright white of bone, normal muscle is relatively hypoechoic. However, it is not uniformly dark. Within the muscle belly, you’ll see numerous bright, hyperechoic strands interspersed throughout the darker muscle fascicles. This gives it what many describe as a “starry night” or marbled appearance.
These bright strands are the perimysium and endomysium—connective tissue sheaths composed of fibro-adipose (fibrous and fatty) tissue that encase the muscle bundles (fascicles). This connective tissue is more echogenic than the muscle fibers themselves, creating that classic heterogeneous pattern. Just as you would see in an anatomy textbook, you can appreciate the complex architecture. In the image provided, which shows a muscle overlying the humerus, you can even see the muscle tapering towards its tendinous insertion at the top of the screen.
From this single image, I can’t definitively say whether we’re looking at the biceps or the deltoid without knowing the precise probe location and orientation on the patient. The key takeaway is the expected, recognizable pattern of healthy muscle. In my clinical practice, deviations from this pattern—such as areas of increased hypoechogenicity, loss of the fibrillar pattern, or swelling—can indicate pathology like a muscle strain, tear, or atrophy.
Differentiating Cartilage: Hyaline vs. Fibrocartilage
Cartilage is another critical structure we frequently assess, particularly in joints. It’s essential to understand that there are different types of cartilage, each with distinct appearances on ultrasound. The two primary types we encounter in MSK imaging are hyaline cartilage and fibrocartilage.
Hyaline cartilage is the smooth, glistening tissue that covers the articular surfaces of bones within synovial joints, like the shoulder, knee, and hip. Its purpose is to provide a low-friction surface for smooth joint movement. Because it is very uniform and has a high water content, it appears on ultrasound as a distinct, smooth, hypoechoic (dark) band situated directly on top of the bright hyperechoic line of the subchondral bone. In the image of the posterior shoulder, you can clearly see this dark stripe on the surface of the humeral head—that is healthy hyaline cartilage.
Fibrocartilage, on the other hand, is a much tougher, more fibrous tissue designed to absorb shock and improve joint congruity. Examples include the knee menisci and the labra of the shoulder and hip. Due to its dense, fibrous collagen structure, fibrocartilage is significantly brighter than hyaline cartilage. It appears as a hyperechoic, often triangular, structure. In that same shoulder image, the glenoid labrum is visible as a bright, triangular structure, starkly contrasting with the dark hyaline cartilage on the humeral head.
Being able to differentiate these two types of cartilage is clinically vital. When I evaluate a patient with shoulder pain, I am specifically looking for defects, fraying, or tears in the hyperechoic labrum, as well as thinning or irregularities in the hypoechoic hyaline cartilage, which would suggest chondromalacia or osteoarthritis. You’ll also notice in the image that other tissues like muscle and subcutaneous fat can appear somewhat isoechoic—having a similar grayish brightness. This underscores the importance of not only assessing echogenicity but also considering location, shape, and architectural pattern to identify each structure correctly.
Distinguishing Ligaments, Nerves, and the Anisotropy Artifact
Ligaments: Dense, Taut, and Ready for Stress
At first glance, ligaments can look very similar to tendons. Both are composed of dense connective tissue and appear as bright, hyperechoic, fibrillar structures. However, there are subtle but important differences. Ligament fibers are typically even more densely and tightly packed than tendon fibers. This results in a fibrillar pattern that can appear more compact and less striated than a tendon.
The definitive way to distinguish a ligament from a tendon using ultrasound, however, is by tracing its connections. This is a fundamental principle I stress in my teaching. A tendon connects a muscle to a bone. A ligament connects bone to bone. If I’m evaluating a structure on the medial side of the knee, for instance, and I’m unsure if it’s a hamstring tendon or the Medial Collateral Ligament (MCL), I trace it. If I follow it proximally and it transitions into a muscle belly, it’s a hamstring tendon. If I trace it and see it attaching firmly from the femoral condyle to the tibial plateau, I know I’m looking at the MCL.
This brings us to one of the most powerful features of ultrasound: real-time dynamic evaluation. Static MRI images can show a tear, but they cannot show how a ligament behaves under stress. With ultrasound, I can perform a valgus stress test on the knee while visualizing the MCL. I can physically apply pressure to the joint and watch the screen to see if the ligamentous fibers separate or “gap.” Is the ligament competent? Is there a subtle, partial tear (Grade 1), a more significant partial tear with some gapping (Grade 2), or a complete rupture with significant gapping (Grade 3)? This point-of-care assessment provides immediate, functional information that is invaluable for diagnosis and treatment planning.
When documenting these findings for a diagnostic report, the language must be precise. For example, I might write: “The linear transducer was placed over the medial aspect of the knee in a long-axis orientation to visualize the MCL. Upon application of a real-time valgus stress, significant gapping of the ligamentous fibers was observed at the femoral insertion, accompanied by a localized hypoechoic fluid collection, consistent with a Grade 3 sprain/rupture.” This clear, descriptive language allows any other provider to understand exactly what was seen and how the diagnosis was confirmed.
Nerves: The Honeycomb in the Tissue
Nerves have a truly unique and fascinating appearance on ultrasound, quite different from that of tendons and ligaments. A nerve is essentially a bundle of wires (the fascicles) wrapped in connective tissue (the epineurium). This complex structure creates a mixed-echogenicity pattern.
In a short-axis or cross-sectional view, a nerve famously looks like a honeycomb. The nerve fascicles themselves are hypoechoic (dark), while the surrounding connective tissue, the epineurium, is hyperechoic (bright). This creates a speckled or honeycomb-like appearance that is highly characteristic. This is often surrounded by hyperechoic perineural fat, which can further help delineate the nerve from adjacent structures.
The carpal tunnel image provides a classic example of this. The median nerve is outlined, and you can clearly see the individual dark fascicles surrounded by the bright epineural tissue. In a long-axis view, this pattern is less distinct. The nerve can look somewhat like a tendon, with parallel lines, but the “fibrils” are the hypoechoic fascicles, and the overall appearance is less bright and more rope-like than a tendon.
A clinical pearl I always share is that nerves are often easier to spot when you scan. Your eye is naturally drawn to motion and contrast. As you slide the probe rapidly over an area like the forearm, the honeycomb pattern of the median nerve will “pop” as it travels through the surrounding tissues, which have a more uniform or linear appearance. In my experience at HealthVoice360, this “fast scanning” technique is one of the most effective ways to quickly locate a target nerve before slowing down for a more detailed examination. The carpal tunnel is the ideal place to practice this, as the contrast between the honeycomb median nerve and the adjacent fibrillar flexor tendons is exceptionally clear.
The Pitfall of Anisotropy: Not All That’s Dark is Torn
Now we must discuss one of the most critical concepts in musculoskeletal ultrasound, a phenomenon that can fool even experienced practitioners: anisotropy. Anisotropy is an imaging artifact, not true pathology. It is a variation in echogenicity that occurs when the ultrasound beam is not perfectly perpendicular to the tissue being imaged, particularly in highly organized fibrillar structures such as tendons.
When the ultrasound beam strikes a tendon at a 90-degree angle, the sound waves are reflected directly back to the probe, and the tendon appears bright and hyperechoic. However, if the probe is tilted even slightly so that the beam strikes the tendon at an oblique angle, the sound waves are reflected away from the probe rather than back to it. With fewer returning echoes, the machine interprets that area of the tendon as being hypoechoic (dark). This dark appearance can perfectly mimic a partial or full-thickness tear.
This artifact is incredibly common, especially when imaging curved structures like the rotator cuff tendons as they wrap around the humeral head. The image of the supraspinatus footprint demonstrates this perfectly. These are two images of the same healthy tendon, taken seconds apart. In the first image, the probe was not perfectly perpendicular to the tendon insertion, and the area appears dark, suggestive of a tear. In the second image, I “toggled” or “heel-toed” the probe to make the beam perpendicular to the tendon fibers, and the artifact vanished, revealing the healthy, bright, fibrillar tissue.
So, how do we differentiate true pathology from this annoying artifact? This is where good technique and critical thinking are paramount. As we were taught in orthopedic surgery, “one view is no view.” If I see a hypoechoic region in a tendon, I must convince myself it is real.
- Maneuver the Probe: I will meticulously rock the probe back and forth (heel-toe maneuver) to see if I can make the dark area “fill in” and become bright. If the darkness disappears with a slight change in angle, it is anisotropy.
- Confirm in Two Planes: If the dark spot persists despite toggling, I will rotate the probe 90 degrees to view the tendon in a short-axis (cross-sectional) view. A true tear will typically be visible as a hypoechoic or anechoic defect in both planes.
- Dynamic Assessment: If I still suspect a tear, I will use point-of-care dynamic testing. For a suspected rotator cuff tear, I would have the patient perform resisted abduction. If it’s a true tear, I may see the tear “gap” or widen under stress.
Only after I have exhausted these maneuvers and confirmed the defect’s presence across multiple views and potentially under stress, will I confidently diagnose a tear. Mistaking anisotropy for a tear is one of the most common errors for novice imagers. Mastering probe control to eliminate this artifact is a hallmark of a skilled ultrasound operator.
Mastering the Craft: Probe Handling and Interventional Technique
The quality and diagnostic accuracy of an ultrasound examination are entirely dependent on the person holding the probe. This cannot be overstated. Ultrasound is 100% operator-dependent. Therefore, developing meticulous and versatile probe handling skills is not just a suggestion; it’s an absolute requirement for clinical excellence.
The Tripod Technique: Stability and Fine Control
The first rule of probe handling is to avoid “floating” the probe or holding it by its tail. This offers no stability and makes the fine, millimeter-scale adjustments needed for high-quality imaging impossible. Instead, we must anchor our hand to the patient. The standard and most effective method for this is the tripod technique.
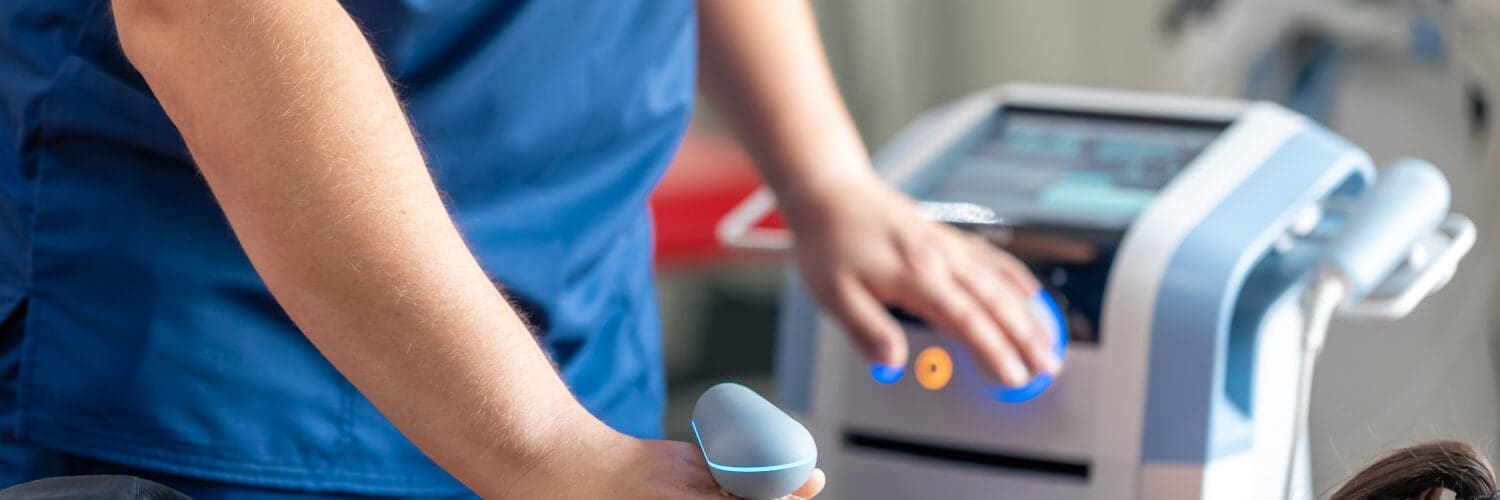
The core principle is to use one or more fingers of your scanning hand as a brace on the patient’s skin, creating a stable base. This allows you to hold the probe, typically like a pencil or with a modified grip, and make very precise movements with your thumb and index finger. Notice in the image how the operator’s fingers rest firmly on the patient, providing a stable platform for manipulating the probe.
Now, everyone’s hand size is different, and the probes themselves vary in size and shape. My hands are relatively small, so I often have to modify this technique. I can’t always get three fingers down on the patient while comfortably holding a large probe. I frequently use a one or two-finger brace, typically with my pinky and/or ring finger, while controlling the probe’s position and pressure with my index finger and thumb. The key is not the exact number of fingers, but the principle of creating a stable contact point between your hand and the patient. This allows for the subtle toggling (heel-toe rocking), sliding (moving along the structure), and rotating movements that are essential for a thorough diagnostic scan.
Adapting the Grip for Interventional Procedures
It is critically important to understand that the way you hold the probe for a diagnostic scan is often different from how you must hold it for an interventional procedure, such as a guided injection. I see this error frequently in my teaching sessions. Many clinicians are trained in diagnostic ultrasound by wrapping their entire hand around the probe for maximum stability. While this is indeed very stable for imaging, it creates a major problem for interventions: your own fingers get in the way.
If your fingers are wrapped around the side of the probe where your needle needs to enter, you create a physical barrier. You won’t have a sterile field for needle entry, and you risk contaminating your procedure or even sticking yourself. The solution is to adapt your grip to clear the path for the needle.
As you can see in the video stills of my own hand, I demonstrate two primary grips for interventions:
- In-Plane Technique (“Pencil Grip”): For an in-plane approach, where the needle enters parallel to the probe’s long axis and is visualized along its entire length, I hold the probe like a pencil. This keeps my fingers on top of and behind the probe, leaving the entire area at the probe’s tip open for needle insertion.
- Out-of-Plane Technique (“Edge Grip”): For an out-of-plane approach, where the needle enters perpendicular to the probe and appears as a bright dot in cross-section, I hold the probe by its edges. Again, this keeps my fingers out of the “line of fire” and provides a clear, sterile path for the needle.
Becoming facile with these different grips is essential for any clinician performing ultrasound-guided procedures. You have to be able to move the probe around the patient’s anatomy while anticipating where your needle needs to go and adjusting your hand position accordingly. The goal is always to set yourself up for success.
The Philosophy of “Tip-to-Target”: A Strategy for Success
My core philosophy for ultrasound-guided interventions is simple: make it as easy as possible for yourself. This means taking the time to plan your approach meticulously before the needle ever touches the skin.
I see many practitioners get “close-ish” to their target, become impatient, and insert the needle. Then begins the frustrating dance of “chasing the needle.” They scan around, trying to find the needle tip, then move the probe back to locate the target, only to lose the needle again. This is inefficient and increases procedure time and patient discomfort.
My protocol is different.
- Find the Target First: I perform a thorough diagnostic scan to identify the anatomical target precisely.
- Optimize the View: I then maneuver the probe until the target is directly in the center of my screen and I am perfectly perpendicular to it. This is a crucial step. By eliminating oblique angles, I know that the shortest path from the skin to the target is a straight line directly under my probe. This removes the need for complex mental calculations about compound angles.
- Plan the Trajectory: With the target centered and my probe perpendicular, I know that if I’m doing an in-plane injection, my needle needs to enter at a specific angle (e.g., 45 degrees) and travel in a straight line, staying within the “credit card thin” ultrasound beam.
- Bring Tip to Target: Only after this pre-planning do I insert the needle. My goal is to guide the needle tip directly to the target that I am keeping perfectly in view.
This methodical “find the target, then bring the tip to the target” approach dramatically increases success rates, reduces procedure time, and improves safety. For those who are new to interventions, I cannot stress this enough: resist the urge to rush. Pre-planning your trajectory and ensuring you are perpendicular to the target will make your procedures smoother, faster, and more effective. While advanced users can certainly perform injections using complex angles, mastering this foundational perpendicular approach is the key to consistent success.
Clinical Application and Dynamic Assessment: A Case Study
Let’s synthesize these concepts with a practical clinical scenario that I encounter regularly in my practice. A patient presents with medial knee pain after a twisting injury while playing soccer. They have point tenderness over the medial joint line. My primary differential diagnosis includes a meniscal tear and a sprain of the Medial Collateral Ligament (MCL).
A physical exam reveals laxity with a valgus stress, but I want to quantify the injury and rule out other pathologies. This is a perfect indication for a point-of-care ultrasound examination.
The Examination Process:
- Patient Positioning: I have the patient lie supine on the exam table with their knee slightly flexed over a bolster to relax the surrounding musculature.
- Probe and Orientation: I selected an orientation transducer because the MCL is a superficial structure. I apply a generous amount of gel to the medial aspect of the knee. I orient the probe in a long-axis view, aligning it with the expected orientation of tOrientationenting the femur to the tibia. On my screen, I set the orientation so that it orients the patient’s head) The proximal (towards the body) is on the left, and the distal (towards the foot) is on the right. This intuitive orientation means I have to do mental gymnastics; what I see on the screen directly corresponds to the patient’s anatomy.
- Initial Diagnostic Scan: I begin by identifying my bony landmarks: the sharp, hyperechoic lines of the medial femoral condyle and the medial tibial plateau. I then identify the MCL as the taut, hyperechoic, fibrillar band connecting these two bones. I scan through its entire length, from the femoral insertion to the tibial insertion, looking for any abnormalities. In a healthy ligament, I expect to see a continuous, bright, and organized structure. In this patient, I notice a region near the femoral insertion that appears hypoechoic and disorganized.
- Differentiating Anisotropy from Pathology: My first thought is to rule out anisotropy. I carefully toggle the probe, rocking it heel-to-toe, to see if this dark area “fills in” and becomes bright. In this case, the hypoechoic region persists regardless of my probe angle. This significantly increases my suspicion of a true tear. I then rotate the probe 90 degrees into a short-axis view and identify a corresponding dark defect, confirming the finding in two planes.
- The Dynamic Stress Test: This is the definitive step. To assess the ligament’s functional competence, I need to stress it. Here, the question of whether one or two practitioners are needed arises. As was asked, can this be done alone? The answer is yes, though it requires some practice. I brace the patient’s thigh against the exam table with my non-scanning hand and my body. With the probe held firmly over the MCL with my other hand, I use my forearm to apply a gentle but firm valgus force to the patient’s ankle, effectively gapping the medial side of the knee.
The Findings and Report:
As I apply valgus stress, I watch the screen in real time. I observe the hypoechoic defect at the femoral insertion widen significantly. The two ends of the torn ligament pull apart, and the dark, fluid-filled gap increases in size. There is clear gapping of the ligament. I have now dynamically confirmed a high-grade, likely complete (Grade 3), tear of the MCL at its proximal insertion.
My report would reflect this entire process: “Point-of-care musculoskeletal ultrasound of the medial right knee was performed using a high-frequency linear transducer. In the long-axis view, the medial collateral ligament demonstrated a focal hypoechoic and heterogeneous appearance at its proximal femoral insertion. This finding persisted with probe toggling, ruling out anisotropy. Upon real-time valgus stress application, significant gapping (>1 cm) was observed at the site of the defect, with extravasation of anechoic fluid, confirming a full-thickness Grade 3 tear of the proximal MCL.”
This examination, which took only a few minutes, provided a definitive diagnosis, quantified the severity of the injury, and enabled me to have an immediate, informed discussion with the patient about their treatment options, whether conservative management with bracing or a referral for surgical consultation. This is the power of ultrasound—it is not just a glorified flashlight; it is an extension of our clinical examination, providing real-time anatomical and physiological insights right at the patient’s bedside.
Summary
This educational post, written from my perspective as Dr. Alexander Jimenez, provides a comprehensive overview of musculoskeletal ultrasound, combining foundational principles with advanced clinical application. We began by establishing the core ultrasound vocabulary (hyperechoic, hypoechoic, and isoechoic) and emphasizing a pattern-recognition approach to identifying different tissues. We detailed the characteristic appearances of healthy tendons (bright, fibrillar), muscles (hypoechoic with hyperechoic strands), hyaline cartilage (smooth, dark), fibrocartilage (bright, triangular), and nerves (a “honeycomb” in cross-section).
A significant focus was placed on the critical imaging artifact known as anisotropy, explaining how a non-perpendicular ultrasound beam can make a healthy tendon appear pathologically dark. We outlined a systematic approach to differentiate this artifact from a true tear through probe manipulation (toggling) and multi-planar imaging. The unparalleled advantage of ultrasound—its capacity for real-time dynamic assessment—was highlighted by performing a stress test on a ligament to observe functional incompetence and gapping.
Furthermore, we delved into the modality’s operator-dependent nature, detailing specific, evidence-based techniques for probe handling. We contrasted the stable tripod technique for diagnostic scanning with the modified “pencil” and “edge” grips used in interventional procedures, emphasizing the need to maintain a clear, sterile path for the needle. The “tip-to-target” philosophy was presented as a systematic protocol for successful guided injections, prioritizing meticulous pre-planning and maintaining a perpendicular orientation to the target to improve efficiency and accuracy. This post integrates the latest findings from leading researchers with my own clinical observations from HealthVoice360, aiming to provide a practical, in-depth guide for clinicians.
Conclusion
As of May 2, 2026, musculoskeletal ultrasound stands as an indispensable tool in modern medicine, bridging the gap between physical examination and static imaging. Its ability to provide dynamic, real-time visualization of anatomy in motion offers diagnostic insights that no other modality can replicate at the point of care. From accurately diagnosing a tendon tear while ruling out artifacts like anisotropy, to assessing ligamentous stability under stress, to guiding a needle with millimeter precision to its target, ultrasound empowers clinicians to be more accurate, efficient, and confident in their work. The key to unlocking this potential lies not in the machine itself, but in the hands and mind of the operator. By mastering the principles of pattern recognition, probe manipulation, and systematic procedural planning, we can use this technology to improve the standard of care and achieve better outcomes for our patients.
Key Insights
- Pattern Recognition is Key: Successful ultrasound interpretation relies on learning the unique architectural patterns of different tissues (e.g., fibrillar tendons, honeycomb nerves), not just their grayscale brightness.
- Anisotropy is a Universal Pitfall: Always suspect anisotropy when you see a hypoechoic area in a tendon. Use probe toggling (“heel-toe”) to confirm if the finding is a true pathological defect or an artifact of the beam angle. “One view is no view.”
- Dynamic Assessment is Ultrasound’s Superpower: Use real-time stress testing to evaluate ligament functional integrity. Observing for gapping provides a definitive diagnosis of instability that static imaging cannot offer.
- Technique Dictates Success: Ultrasound is 100% operator-dependent. Master the stable “tripod grip” for diagnostics and adapt your grip for interventions to ensure a clear path for the needle.
- Plan Your Intervention: Adhere to a “tip-to-target” methodology. First, find your target and optimize the image by being perpendicular to it. Only then should you introduce the needle, making the procedure faster, safer, and more successful.
References
- Jacobson, J. A. (2018). Fundamentals of Musculoskeletal Ultrasound (3rd ed.). Elsevier.
- Bianchi, S., & Martinoli, C. (2007). Ultrasound of the Musculoskeletal System. Springer.
- Finnoff, J. T., & Smith, J. (Eds.). (2016). Musculoskeletal Ultrasound in Sports Medicine. Springer.
- HealthVoice360 Clinical Archives. (2024-2026). Internal case studies and clinical observations. El Paso, TX. Available at: https://healthvoice360.com/
- Journal of Ultrasound in Medicine. (Ongoing). Official journal of the American Institute of Ultrasound in Medicine (AIUM).
- European Journal of Ultrasound. (Ongoing). Official journal of the European Federation of Societies for Ultrasound in Medicine and Biology (EFSUMB).
Keywords
Musculoskeletal Ultrasound, MSK Ultrasound, Dr. Alexander Jimenez, Point-of-Care Ultrasound, POCUS, Anisotropy, Hyperechoic, Hypoechoic, Fibrillar Pattern, Tendinopathy, Ligament Sprain, Dynamic Assessment, Ultrasound-Guided Injection, Probe Handling, Tripod Technique, Interventional Ultrasound, Nerve Imaging, Honeycomb Pattern, Rotator Cuff, MCL Injury, Carpal Tunnel Syndrome, Evidence-Based Imaging.
Disclaimer: The information provided in this educational post is intended for informational and educational purposes only and is not a substitute for professional medical advice, diagnosis, or treatment. This content reflects the clinical experience and perspective of Dr. Alexander Jimenez, DC, APRN, FNP-BC, and incorporates findings from the referenced literature. It should not be used to make decisions about your health.
Personal Medical Advice Disclaimer: All individuals are unique. The information presented here is general in nature. You must consult with your own qualified healthcare provider for any medical advice, diagnosis, or treatment recommendations tailored to your personal situation and health needs. Do not disregard professional medical advice or delay in seeking it because of something you have read in this post.
General Disclaimer
Professional Scope of Practice *
The information herein on "Ultrasound Therapy: Key Benefits for the Musculoskeletal System" is not intended to replace a one-on-one relationship with a qualified health care professional or licensed physician and is not medical advice. We encourage you to make healthcare decisions based on your research and partnership with a qualified healthcare professional.
Blog Information & Scope Discussions
Welcome to El Paso's Premier Wellness and Injury Care Clinic & Wellness Blog, where Dr. Alex Jimenez, DC, FNP-C, a Multi-State board-certified Family Practice Nurse Practitioner (FNP-BC) and Chiropractor (DC), presents insights on how our multidisciplinary team is dedicated to holistic healing and personalized care. Our practice aligns with evidence-based treatment protocols inspired by integrative medicine principles, similar to those found on this site and our family practice-based chiromed.com site, focusing on restoring health naturally for patients of all ages.
Our areas of multidisciplinary practice include Wellness & Nutrition, Chronic Pain, Personal Injury, Auto Accident Care, Work Injuries, Back Injury, Low Back Pain, Neck Pain, Migraine Headaches, Sports Injuries, Severe Sciatica, Scoliosis, Complex Herniated Discs, Fibromyalgia, Chronic Pain, Complex Injuries, Stress Management, Functional Medicine Treatments, and in-scope care protocols.
Our information scope is multidisciplinary, focusing on musculoskeletal and physical medicine, wellness, contributing etiological viscerosomatic disturbances within clinical presentations, associated somato-visceral reflex clinical dynamics, subluxation complexes, sensitive health issues, and functional medicine articles, topics, and discussions.
We provide and present clinical collaboration with specialists from various disciplines. Each specialist is governed by their professional scope of practice and their jurisdiction of licensure. We use functional health & wellness protocols to treat and support care for musculoskeletal injuries or disorders.
Our videos, posts, topics, and insights address clinical matters and issues that are directly or indirectly related to our clinical scope of practice.
Our office has made a reasonable effort to provide supportive citations and has identified relevant research studies that support our posts. We provide copies of supporting research studies upon request to regulatory boards and the public.
We understand that we cover matters that require an additional explanation of how they may assist in a particular care plan or treatment protocol; therefore, to discuss the subject matter above further, please feel free to ask Dr. Alex Jimenez, DC, APRN, FNP-BC, or contact us at 915-850-0900.
We are here to help you and your family.
Blessings
Dr. Alex Jimenez DC, MSACP, APRN, FNP-BC*, CCST, IFMCP, CFMP, ATN
email: coach@elpasofunctionalmedicine.com
Multidisciplinary Licensing & Board Certifications:
Licensed as a Doctor of Chiropractic (DC) in Texas & New Mexico*
Texas DC License #: TX5807, Verified: TX5807
New Mexico DC License #: NM-DC2182, Verified: NM-DC2182
Multi-State Advanced Practice Registered Nurse (APRN*) in Texas & Multistate
Multistate Compact RN License by Endorsement (42 States)
Texas APRN License #: 1191402, Verified: 1191402 *
Florida APRN License #: 11043890, Verified: APRN11043890 *
* Prescriptive Authority Authorized
ANCC FNP-BC: Board Certified Nurse Practitioner*
Compact Status: Multi-State License: Authorized to Practice in 40 States*
Graduate with Honors: ICHS: MSN-FNP (Family Nurse Practitioner Program)
Degree Granted. Master's in Family Practice MSN Diploma (Cum Laude)
Dr. Alex Jimenez, DC, APRN, FNP-BC*, CFMP, IFMCP, ATN, CCST
My Digital Business Card
RN: Registered Nurse
APRNP: Advanced Practice Registered Nurse
FNP: Family Practice Specialization
DC: Doctor of Chiropractic
CFMP: Certified Functional Medicine Provider
MSN-FNP: Master of Science in Family Practice Medicine
MSACP: Master of Science in Advanced Clinical Practice
IFMCP: Institute of Functional Medicine
CCST: Certified Chiropractic Spinal Trauma
ATN: Advanced Translational Neutrogenomics